Can I just tell you how happy I was to stumble upon this recipe from Noshings. It’s sooo good that I can finish it two sitting for breakfast and snacks and sometimes till dinner time with pasta or with a creamy soup. It’s that good that am actually waking earlier than usual just so I can have it for breakfast – I bet you’ll crave for it once you taste this incredibly soft and fluffy bread.
 I’ve always been intimidated with making bread – because I have not used yeast before. I’ve watched a drama where the leads are bread makers and totally fell in love with the process on how they made bread, from dough making to forming them into different shapes. I was just in awe that I immediately read and searched as much as I can on the internet. It took a while for me to be brave enough to get my hands dirty and make bread – the terms I’ve read from some of the recipes are just not sinking into my pea sized brain for one thing – terms like proofing, starters, scoring etc. So until I really felt more comfortable, I eventually got the courage to make my first bread.- but only after reading one blog after the other and a more thorough research and back and forth reading.
After going thru Noshings recipe – I was glad it was idiot proof! She made making bread easy for a novice like me that I plan to make her other bread recipes soon. As the blog promised – you’ll love it that you’ll make it over and over. That I’ve done! in a month’s time, I’ve done it once a week that I’ve developed my own method – so here goes!
Ingredients
Tangzhong Starter
- 1/3 cup all-purpose flour
- 1 cup milk
Dough
- 2 tbsp sugar
- 1/2 cup warm milk (lukewarm)
- 2 tsp dry active yeast (I use Red Star)
- 2 tbsp butter
- 2 3/4 bread flour (I used tipo 00)
- 1 tsp salt
- 1 tbsp buttermilk powder
- 1 egg
- 1 lightly beaten egg for egg wash
Direction
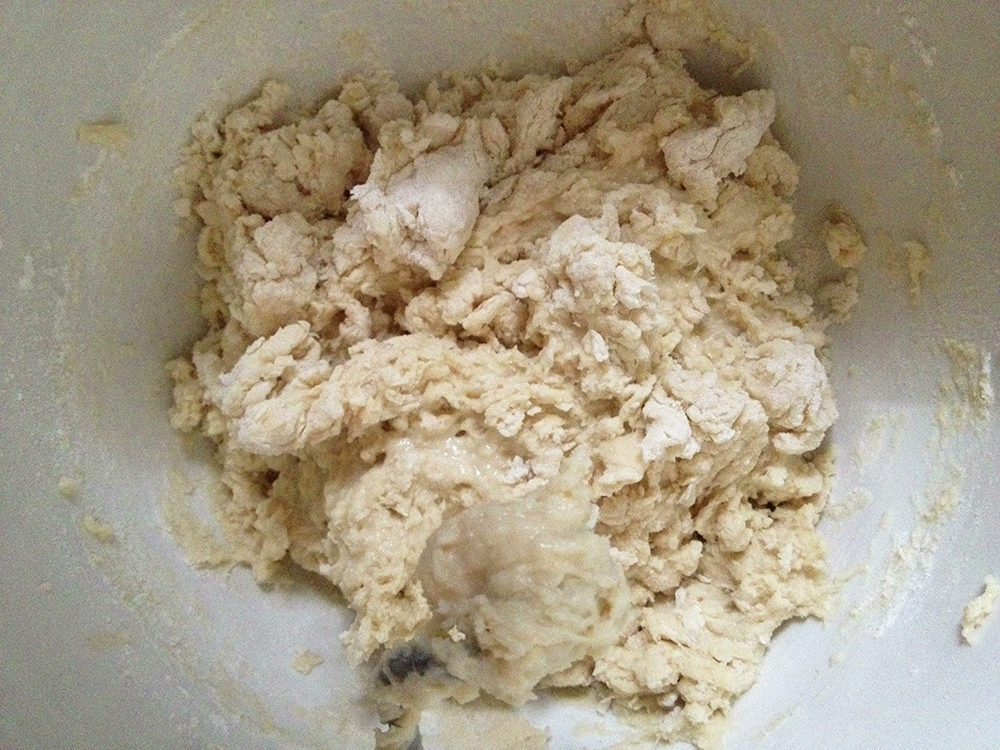
- Make your Tangzhong starter by heating your milk and flour in medium heat – whisk while in heat until it thickens (do not let it reach boil and remove from heat). Set aside to cool. According to research Tangzhong bread making was developed by the Chinese for a softer and fluffy bread – but Tangzhong method originated in Japan. Amazingly this method keeps the bread softer and fluffy even after a few days – by simply reheating in the microwave for 10-15 seconds. We’ll be using half of this mixture in this recipe, so set aside the other half, keep refrigerated and use at least in the next 3 days.
- Soften your butter and set aside (I heat it on the microwave in less than a minute) . In a medium bowl, add sugar, yeast and lukewarm milk (not too hot to the skin-is how I determine). Set aside 5-10 minutes for the yeast to activate.
- In a large bowl, add 2 1/2 cups of the bread flour and set aside remaining 1/4. Add salt and buttermilk powder and whisk together to incorporate the ingredients.
- Once the yeast mixture activates – add half of your Tangzhong starter (should be cool at this point) and the egg and stir to combine.
- Add the yeast mixture into the dry ingredients and mix with your kitchen aid (with a dough hook) or like me a handheld mixer. At this point as your dough can be loose and doughy – you can add your butter (which should be cool at this point) and mix together. At this point your dough can still be sticking to the side of your bowl, so add your remaining 1/4 flour and mix until your dough starts to integrate and is less sticky (until your dough doesn’t stick to the side of your bowl).
- Grease another bowl with olive oil or butter and set aside (grease the bottom and sides). Dust some flour on your working area and carefully roll out your dough and knead for a minute or two and roll into a ball. Place this on your greased bowl and cover with a cling wrap or damp cotton towel. Set aside in a warm area of your kitchen and let it sit for at least an hour – I believe this is what they call proofing.
- After an hour your dough should be double in size. Punch the middle of the dough to let air out. Dust some flour once more on your working area and knead for another minute or two.
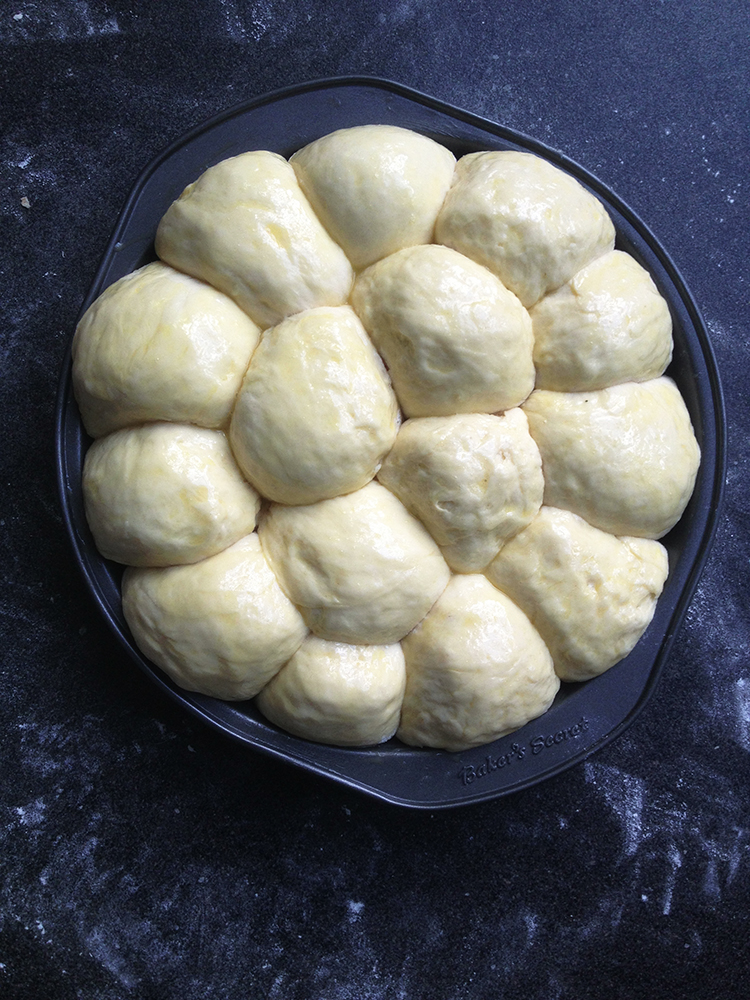
- Grease a 9′ x 9′ x 1′ round pan or a rectangle shallow pan of your choice.
- You can experiment with the shapes of the bread – I first tried Noshings size ( with this recipe she made 4 large rolls) but I felt full easily after eating one piece. I tried to make 8pcs out of this recipe as well – the same I felt like one piece was big for me – so today i made it into 15pcs. and happy to make it into dinner roll sizes. I just knead and stretch the dough to a log shape and cut them to pieces. Lately I tried pressing the cut pieces with my palm to flatten it. I fold it twice from one end to the middle, then the other end to the middle again. Then I bring the two ends to the middle and press the dough ends together and pinch them together to create a seam. So eventually i just press together and pinch the obvious holes to create a perfect round dough. Then place these into your greased pan. After all is done – cover with a cling wrap or damp cotton towel again for at least 45 minutes or more.
- 15 minutes before your second proofing ends – preheat your oven to 350 degrees F/180 degrees C. Before it’s ready to enter the oven, carefully brush your egg wash into your dough. Bake for 30 minutes – 20 minutes into baking I insert a foil on top of the bread to keep the top from getting burnt ( another great tip from Noshings). Take out 5 minutes later after the timer ends. And let it cool another 10 minutes then dig in!
This could be quite a read – but am hopeful you’ll get thru this until it becomes a breeze, because it’s one bread recipe you’ll surely be making over and over. Yes eatsthatgood! For my fellow novice cook out there I’ve tried to take a photo of the process so enjoy and hope to hear your experience soon.